Then one day I had some - and I learned what I was missing, and became obsessed. BUT Greek yogurt costs 3 times what I was paying for my store-brand regular yogurt! Also, if you want the good stuff (without added gelatin or "protein solids") that is just pure yogurt, you end up paying even more (Chobani or Fage, anyone?) And after a couple of weeks of going over with my grocery budget, I thought there had to be a better way to get my Greek yogurt fix.
So I started googling. I had heard of making homemade yogurt (Eric's dad does it all the time, apparently) but I had never tried it or actually paid attention to what needed to be done.
With the help of a couple of websites:
this one in particular, and this one
I made my very own Greek yogurt (at a fraction of the cost!)
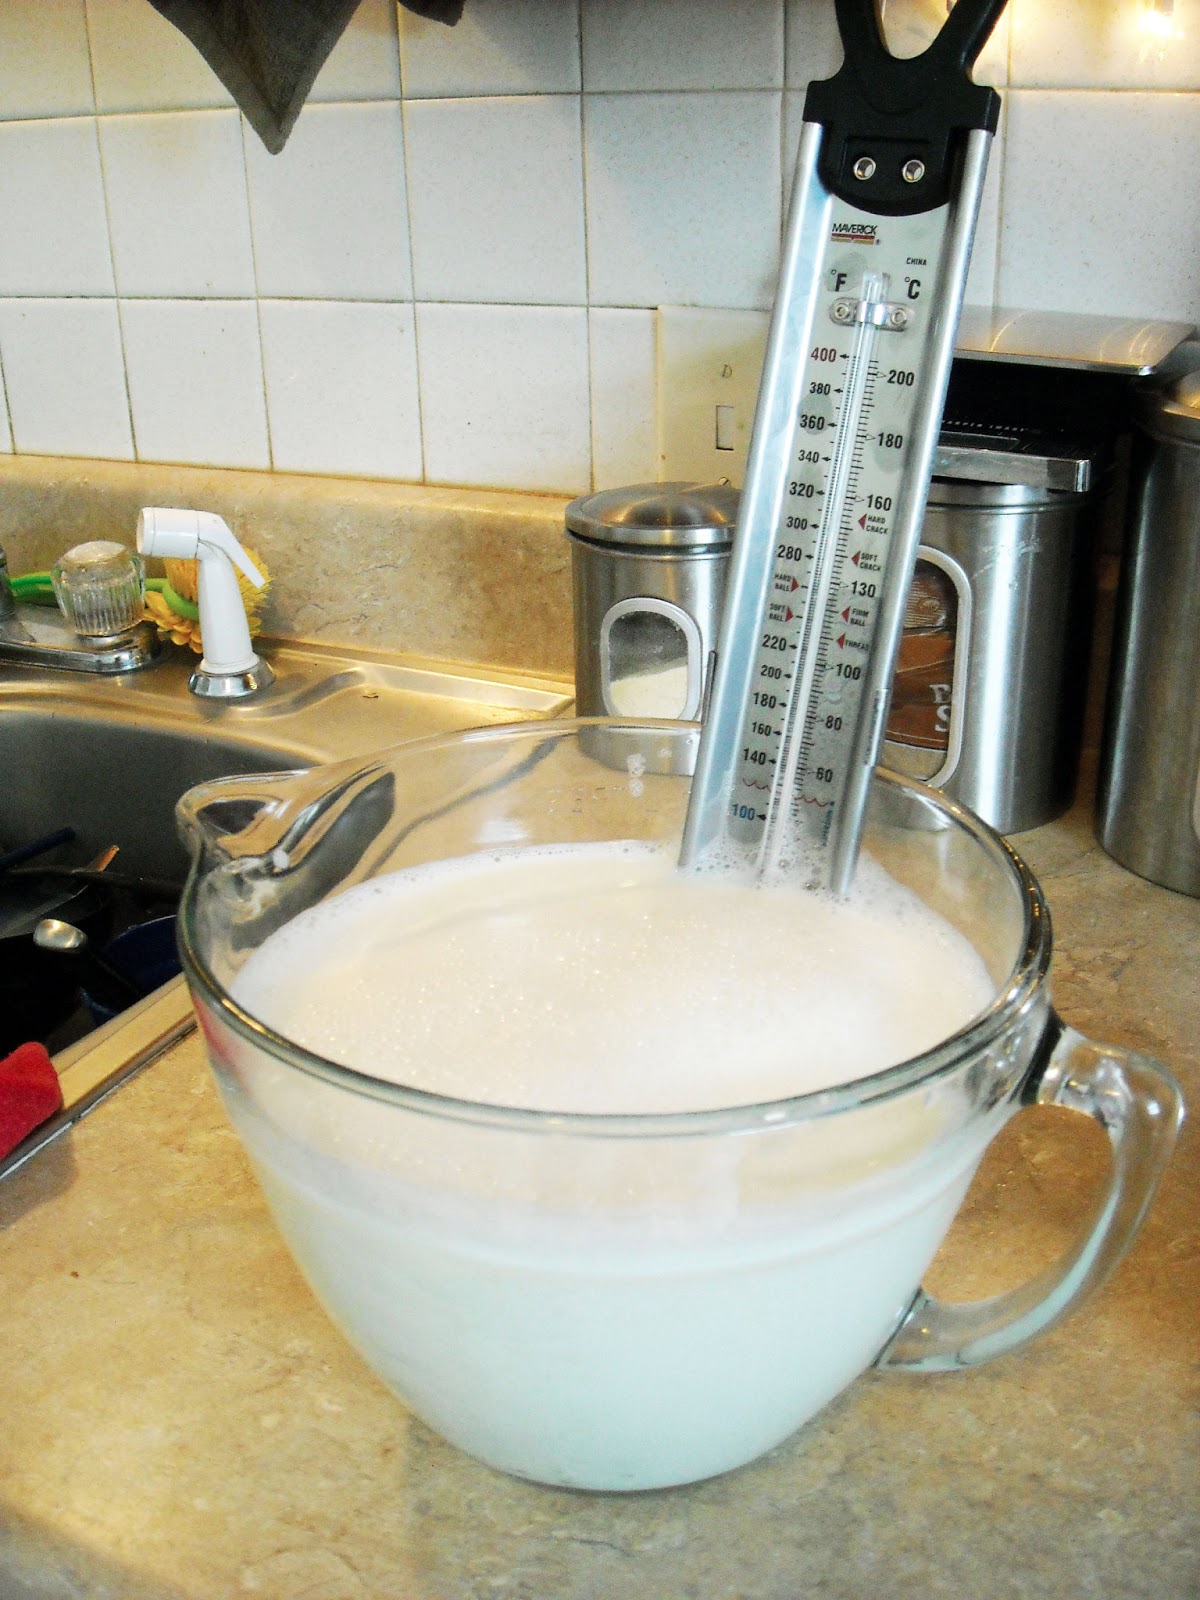
You start out with milk. I used a half gallon, and I used skim. You can use however much you want to, and whatever kind you want to. If you really want rich yogurt, I've even seen people use part cream. Crazy stuff here, people!
The basic recipe is this:
- 1/2 gallon milk
- A "starter" = 2 to 3 tablespoons plain yogurt (make sure it contains live, active cultures. I used Greek.)
- cooking thermometer
- cheesecloth and a large strainer
Heat the milk to about 180 degrees F. It helps to have a candy thermometer so you can monitor the temperature exactly.

Once it reaches 180 degrees F, remove the pot from the stove and pour the hot milk into an uncovered glass/ceramic bowl or casserole dish. Let the milk cool to around 110 degrees F (again, this is where having a candy thermometer comes in really handy!) This took about 45 minutes for me.
(I've heard of people speeding up the process by having an ice bath, but it was a snow day and I was in no hurry.)
While the milk is cooling, turn on your oven to as low as it will go. Mine only goes down to 170 degrees F, so I turned it on for a couple of minutes then turned it off. Basically, you are trying to create an atmosphere of around 110 degrees F for a couple of hours for your yogurt to incubate. I turned my oven light on at that point as well.
Then combine the bit of milk you saved with the "starter" yogurt in a small bowl. I used 2 tablespoons. According to many blogs, more is not always better, and too much yogurt starter can give a very sour taste. (blogs had ranges from 2 teaspoons to 1/4 cup, to give a general idea.)

When your cooling milk reaches around 110 degrees F, add your yogurt starter/milk and stir it in well. At this point I put a lid on my glass bowl, wrapped it in a towel to insulate it, and set it in my *turned off* oven, leaving the light on to keep it at a slightly elevated temperature.

This incubation part of the process has the most variation across blogs. There are actual yogurt incubaters you can buy that keep it at a very specific temperature. Some people use the oven method. If your oven can actually be set to around 100 degrees F or a "proof" setting, some people leave their ovens on. Some people put it under a heat lamp or use a heating pad. Others put it in a hot water bath in a cooler. Google around and see what works best for you.
I did not check the temperature once my milk was in the warmed oven, and left it to sit for about 8 hours.
When I checked on it after 8 hours, it had turned to yogurt! Success on my first try!
(the time it needs to incubate varies from blog to blog and I'm guessing it also depends on your incubation temperature. I saw everything from 4 hours to 14 hours and a lot of people just leave it overnight. If you check it and it hasn't thickened, try more time. If it got too hot, then you may ave to add more starter because the high temp killed your first active cultures. If the temp is too low, you may have to try again as well as it wasn't warm enough to let the cultures grow. It sounded like you could use the same milk to try again.)

At this point you have yogurt with a top layer of whey (what little miss muffet ate on her tuffet!) If you want normal yogurt, just stir the mixture and refrigerate it, or you can pour off a little of the whey.
For Greek yogurt, refrigerate the yogurt for a couple hours (or overnight) to allow it to fully cool and thicken. Then line a strainer with a couple layers of cheesecloth and place it over a bowl. Put the yogurt into the strainer and let it drain for a couple of hours, until most of the whey is strained off. You may have to stir it a couple of times to get it all strained.

Pour out the liquid that has accumulated in the bottom of the bowl underneath. The liquid is whey. It can be used for multiple different cooking purposes (like used as the liquid in making homemade bread) if you should so desire to keep it. You can re-strain at this point if you want even thicker yogurt.

Put your yogurt into a covered/sealed container. Sources differ, but an average is that it will keep at least a week in the fridge (but mine won't last that long!)
I like to eat my greek yogurt with pureed or chopped berries/fruit and some honey (or my sugar-free torani flavored syrups) to sweeten! I also like to add a couple tablespoons of raw oats or granola.

Here are some stats for anyone interested:
My 1/2 gallon of milk (8 cups) made 750grams/26 oz or a little over 3 cups of greek yogurt, and yielded almost 4 cups of whey.
I pay about $3.50 for a gallon of skim milk at the store (or even less at Aldis!), so for 1/2 gallon I paid $1.75. Throw in 25 cents to cover the cost of the 2 tablespoon starter and I figure I spent $2.00 total on my 3 cup batch of Greek yogurt (about $0.08 an oz)
Chobani or Fage at my grocery store are about 5 dollars for 16oz (2 cups) or 8 dollars for 32 oz (4 cups). That is almost 6-7 dollars for 3 cups of yogurt ($0.25 an oz)
So I'm saving about 4-5 dollars a batch (or $0.17 an oz). Worth it.
(that is assuming you buy Greek yogurt in the large tubs. If you are buying the individually packaged ones, it will most likely be more expensive and you will save even more money.)
It sounds like a lot of work, and the first time you try it will require more concentration. But the only part that requires actual attentive time is the heating of the milk (and if you did it in the crockpot or microwave it would reduce that even!). Everything else is a lot of less-than-5-minute steps. The actual hands-on time is very low. For me it is very worth it.
Calories and Nutrients:
---227g (1 cup) plain Greek store-bought yogurt: 130-140 calories (0g fat, 9g carbs, 23g protein)
I used 8 cups of skim milk (per cup 80 cal, 0g fat, 11g carbs, 8 g protein) = total 640 cal, 0g fat, 88 carbs, 64 g protein
but I took away 4 cups of whey (per cup 60 cal, 0g fat, 13g carbs, 13 g sugar, 2 g protein) = total 240 cal, 0g fat, 52 g carbs, 8 g protein
So my total batch turned out to be:
400 cal, 0g fat, 36 g carbs, 56 g protein.
If I use the same serving size as above, my Greek yogurt makes 3 servings:
---1 cup of my homemade Greek yogurt: 133 cal (0g fat, 12g carbs, 19 g protein)

No comments:
Post a Comment